
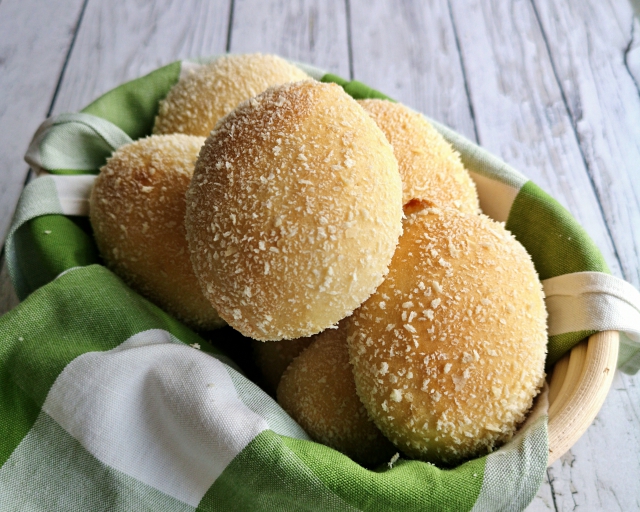
Pandesal is the most common Filipino bread. Most of my friends who have left the Philippines to live abroad usually have pandesal on the top 10 of foods they miss from home. That, of course, includes me.
Read on for a lot of tips on how to make pandesal, by hand or with the help of your stand mixer.
There was a bakery across the street from the house I grew up in. It was common for us to have pandesal, fresh and warm from the oven and in brown paper bags, for breakfast.
The ones that they baked were tiny (roughly 2 inches long and an inch wide), so I would eat up to 5 pieces for breakfast. I liked them simply with butter and cheese, or spread with condensed milk then toasted in a toaster oven until the condensed milk was bubbling, after which I put on a dab of butter.
Soooo delicious!!
And a lot of times we have these for a snack as well.
Nothing beats freshly baked pandesal!
.
I have made a lot of pandesal from different recipes I found online. A LOT!
The best one for me was from Jun Belen over at Jun Blog.
It has no milk nor eggs. It is only enriched by a bit of butter.
Personally, I find that if the pandesal recipe has milk or eggs, it becomes too rich, soft, and fluffy, more like a normal dinner roll rather than my beloved pandesal.
I think the pandesal at the bakery are not enriched, as they harden the next day.
With a bit of butter, the pandesal lasts longer. The pandesal keeps for 3 days at room temperature. If you can’t finish them within 3 days, FREEZE! Then take out the night before or an hour before eating. They taste as good as if they were freshly baked.
I have made it several times, and always changing something with the flour and the method until I came to the recipe below.

For the softest pandesal, make it with all-purpose flour. For a chewier bread, make it with bread flour, and sometimes I like it a bit heartier, so I add in a bit of whole wheat flour.
But I usually make it with around 70% bread flour and 30% all-purpose flour.
It really depends on what type of pandesal you want.
So experiment!
A FEW NOTES ON MAKING BREAD
.
KNOW YOUR FLOUR
The bread flour I buy here in Switzerland needs less water than US bread flour. I found this out when I started making sourdough breads and following recipes from the US. So, I suggest, start with less water and adjust accordingly. This way, you are keeping with the ratios of flour to the other ingredients in the recipe.
Most of the bread recipes I´ve read and made have you add more flour as needed, which sometimes has me adding up to a cup more flour! So, I have since learned to start with less water and add more as needed.
WEIGH YOUR INGREDIENTS
I cannot stress the importance of using a weighing scale when making bread. It is the best way to ensure that you are using the right amounts.
Measuring using cups does not always result in the same weight. I developed this recipe using my weighing scale. And I weigh out ALL THE INGREDIENTS, including water.
So, unfortunately, this resulted to weird measurements in cups. But don’t fret, you will still get good bread even if the measurements are not 100% accurate.
MIXING BY HAND
While having a stand mixer do all the hard work for you is great, you do not need one to make pandesal.
From time to time, I like making yeasted breads by hand.
It is nice to feel the dough change in your hands.
Here are some of my tips when making pandesal by hand:
.
Autolyse
First, is to autolyse.
Strictly speaking, an autolyse is mixing the flour and water first and letting it rest for at least 20 minutes. This process hydrates the flour and gluten begins to develop before any kneading is done.
Check here for a very informative article on autolyse.
However, I have found that even if you mix all the ingredients, letting it rest for 30 minutes to an hour before mixing helps immensely.
Initial kneading with stretch and folds
After the autolyse, I knead the dough for at least 2 minutes.
Kneading is essential in building gluten in the dough, which will give the bread its structure and form once baked. Usually, you knead for around 10 minutes to develop the gluten properly. But since we already did an autolyse (and we will do an additional series of stretch and folds), a long knead is not required.
I knead my dough using 2 methods – the usual kneading of pushing the dough down and away from me using the heel of my hand and the slap and fold, in which I slap the dough on my work surface and fold it halfway towards me. I alternate depending on my mood.
Here is a video on how to knead dough.
Then I let it rest for another 30 minutes. After this rest, I do at least one series of stretch and folds. Two will be better.
To do a stretch and fold, you simply put your hand under the dough, pull and stretch as high as you can without tearing the dough, then fold in half. Turn the bowl a quarter, then repeat. Do this at least 4 times.
Here is a video of me doing this process.
Window Pane Test
The window pane test is done to check if there is sufficient gluten development in your bread. Good gluten development is one of the factors for getting good bread. This is where an autolyse helps. It jumpstarts gluten development so you don’t have to knead as long.
To do the window pane test, pull up your dough and try to stretch it with your fingers. If it stretches easily without tearing, then your dough is ready. If not, continue kneading, stopping every 5 minutes to test.
At times, it has taken me 45 minutes to get a windowpane with my stand mixer. Though truth be told, sometimes I stop after around 15 minutes of kneading and the bread still comes out good. So, it´s up to you.
It is also good to note that when you use whole wheat flour, you can never get to a perfect windowpane as the rough edges of the whole grain flour tears through the dough.
Bulk Rise and How To Tell if the Pandesal Dough is Ready to Form

Bulk rise is the first rise of the dough after kneading.
To tell that the dough is done with the bulk rise and ready to form, we usually rely on visuals.
If the dough has doubled in size, it is ready to be cut and formed into pandesal.
Final Proof and How to Tell if the Pandesal Dough is Ready to be Baked
Final proof is the second rise of the dough after being shaped.
To check if the dough is ready to go into the oven, simply press the dough about half a centimetre down. If the dough quickly springs back, it is not fully proofed yet. If the indentation stays, you may bake.
The poke test:
Since the pandesal are small, it normally takes around 30 minutes for them to be ready, so preheat your oven after all your pandesal are shaped.
Timing
You may make the bread from start to finish in a few hours (exact time is depending if you hand mix, use the stand mixer, and what the temperature in your kitchen is.)
You may also pop the dough into the fridge if you need to during the bulk rise.
What I like to do, is make the dough in the evening and do the bulk rise in the refrigerator. The next day, shape, cut into rolls, final prove and bake.
Shaping the Pandesal
This is quite tricky for starters, and it took me a while to find the best way to shape pandesal.
So, what I do is divide the dough into 4.
Then pat one piece into a rectangle, eliminating as much air as possible.

Then roll the dough tightly, pressing each row tightly into the dough. Once you get a log, roll and pat the log into shape.
Here is a video to show that.
Then cut each log into 6 pieces before rolling in bread crumbs.
Freeze the Pandesal
The pandesal keeps for 3 days at room temperature in an air-tight container. Any longer and it hardens and becomes stale.
If you made more than you can consume within 3 days, freeze the pandesal as soon as it cools.
When you want to eat them, take out of the freezer the night before to defrost on the counter. They will be as good as fresh!
So, now that you have read these tips, let’s get to making pandesal.
.

Click here for the printable recipe with the ingredient list.
USING A STAND-MIXER
.
If using active-dry yeast, activate the yeast first. Dissolve the yeast in ¼ cup (60 milliliters) of warm water and 1 teaspoon sugar. Let stand for 5 to 10 minutes. If the mixture starts bubbling and increases in volume, the yeast is active and alive. If not, repeat this step with a new packet of yeast.
If using instant yeast, mix the yeast directly into the flour.
Weigh or measure out your flour into the bowl of your stand mixer. If using different types of flour, mix well.
Add in the salt and sugar. Mix on low using the paddle attachment.
Add in the softened butter and mix on low speed until distributed evenly.
Add in the instant yeast/activated yeast. Drizzle in the water. Start with 1 ¼ cup/280 ml (include the water in the yeast mixture in this if you have activated the yeast.) If the dough is still too dry, slowly drizzle in more water until the dough is well moistened, but not too wet.
If you have added too much water, add more flour, a tablespoon at a time.
Optional (but highly recommended) step: autolyse
Cover the bowl and let it rest for at least 30 minutes and up to an hour.
Change to the hook attachment and knead for about 5 minutes (if you had an autolyse) or up to 15 minutes. Then test the dough by pinching a piece and stretching into a square. If you get a window pane, your dough is ready. If not, continue kneading and testing every 5 minutes.
Bulk rise
Once the dough is ready, scrape down and form the dough into a ball. Using the same bowl, cover and set aside for an hour or until it has doubled in size. Set in a warm area if your kitchen is too cold. In winter, I heat the oven quickly (turn on 1 minute at 100°C) and turn off and leave the light on. Then I put the bowl in the oven.
Or bulk rise in the fridge overnight.
MAKING THE PANDESAL BY HAND
.
Same note for the yeast as above.
Weigh or measure out your flour into the bowl of your stand mixer.
Add in the salt and sugar. Mix well with a wire whisk.
Add in the butter, and work into the flour with your fingers. To do so, use your finger tips and rub the flour and butter together.
Once the butter is incorporated, make a well in the middle and add in the water and yeast. Start with 1 ¼ cup/280 ml (include the water in the yeast mixture in this if you have activated the yeast) and mix in with a rubber spatula. If too dry, slowly add in more water a little at a time until you get a shaggy dough.
Autolyse
Cover with a kitchen towel and set aside to autolyse for at least 30 minutes (up to an hour).
After the autolyse, turn out the dough onto your work area and knead for 2 to 5 minutes.
Cover again and set a timer for 30 minutes.
Stretch and Folds
After 30 minutes, do a series of stretch and folds.
Bulk rise
At this point, you may then continue with the bulk rise. Set the dough aside for an hour or until it has doubled in size. Set in a warm area if your kitchen is too cold. In winter, I heat the oven quickly (turn on 1 minute at 100°C) and turn off and leave the light on. Then I put the bowl in the oven.
Or bulk rise in the fridge overnight.
SHAPING THE PANDESAL
Once the dough has doubled, punch down and ease out onto a floured surface.
Divide depending if you want big or small-ish rolls.
If you want big rolls, divide into 2, then roll into logs (about 30 cm/12 inches long and 5 cm/2 inches wide).
For smaller rolls, divide the dough into 4, roll each piece of dough into logs, about 20 cm/8 inches long and 4 cm/1.5 inches wide).
Then pat one piece of dough into a rectangle, eliminating as much air as possible.
Then roll the dough tightly, pressing each row tightly into the dough. Once you get a log, roll and pat the log into shape.


Prepare 2 baking sheets by lining them with baking paper or silicon baking mats. Pour your breadcrumbs into a shallow bowl.
Cut each dough using a dough cutter or a flat knife, into 1 inch/2.5-centimeter-thick pieces. Roll each piece in the breadcrumbs and arrange on the baking sheets making sure there is space in between as these will still rise.
Cover with a dry kitchen towel and let rest until it has puffed up a bit (but not doubled), 30 minutes to 1 hour (depending on how cold your kitchen is.)
While the pandesal is proofing, preheat oven to 375°F/180°C.
When the pandesal is ready (do the poke test), bake in the oven for 20-25 minutes, until golden brown, alternating the trays halfway.


Let the pandesal cool for a few minutes, then TUCK IN!

Here is a video for making pandesal by hand, incorporating all the videos in this post.
Pin the pandesal recipe for future reference.

Calories
Fat
Carbs
Protein

Tweety
Yields 24 pieces of pandesal
Serves 12
How to make pandesal using the stand mixer or by hand.
3 hr, 30 Prep Time
25 minCook Time
3 hr, 55 Total Time

 Save Recipe
Ingredients
- 500 g (around 4 cups) bread flour or all-purpose flour
- 250 g (around 2 cups) bread flour or all-purpose flour
- 250 g (around 2 cups) whole wheat flour
- 90 g (7 ¼ tbsp) granulated sugar
- 300 g (around 1 ¼ cup) warm water (around 30°C/86°F is fine)
- 7 grams (1 tsp) fine sea salt
- 100 g (around 7 tbsp) unsalted butter, at room temperature
- 1 packet (about 2 ¼ teaspoons, 7 grams) instant yeast or active-dry yeast
Directions
- If using active-dry yeast, activate the yeast first. Dissolve the yeast in ¼ cup (60 milliliters) of warm water and 1 teaspoon sugar. Let stand for 5 to 10 minutes. If the mixture starts bubbling and increases in volume, the yeast is active and alive. If not, repeat this step with a new packet of yeast.
- If using instant yeast, mix the yeast directly into the flour.
- Weigh or measure out your flour into the bowl of your stand mixer. If using different types of flour, mix well.
- Add in the salt and sugar. Mix on low using the paddle attachment.
- Add in the softened butter and mix on low speed until distributed evenly.
- Add in the instant yeast/activated yeast. Drizzle in the water. Start with 1 ¼ cup/280 ml (include the water in the yeast mixture in this if you have activated the yeast.) If the dough is still too dry, slowly drizzle in more water until the dough is well moistened, but not too wet.
- If you have added too much water, add more flour, a tablespoon at a time.
- Optional step: autolyse. Cover the bowl and let it rest for at least 30 minutes and up to an hour.
- Change to the hook attachment and knead for about 5 mins (with autolyse) and up to 15 minutes. Then test the dough by pinching a piece and stretching into a square. If you get a window pane, your dough is ready. If not, continue kneading and testing every 5 minutes.
- Once the dough is ready, scrape down and form the dough into a ball. Using the same bowl, cover and set aside for an hour or until it has doubled in size. Set in a warm area if your kitchen is too cold. In winter, I heat the oven quickly (turn on 1 minute at 100°C) and turn off and leave the light on. Then I put the bowl in the oven.
- Or bulk rise in the fridge overnight.
- Same note for the yeast as above.
- Weigh or measure out your flour into the bowl of your stand mixer.
- Add in the salt and sugar. Mix well with a wire whisk.
- Add in the butter, and work into the flour with your fingers. To do so, use your finger tips and rub the flour and butter together.
- Once the butter is incorporated, make a well in the middle and add in the water and yeast. Start with 1 ¼ cup/280 ml (include the water in the yeast mixture in this if you have activated the yeast) and mix in with a rubber spatula. If too dry, slowly add in more water a little at a time until you get a shaggy dough.
- Cover with a kitchen towel and set aside to autolyse for at least 30 minutes (up to an hour).
- After the autolyse, turn out the dough onto your work area and knead for 2 to 5 minutes.
- Cover again and set a timer for 30 minutes.
- After 30 minutes, do a series of stretch and folds.
- At this point, you may then continue with the bulk rise. Set the dough aside for an hour or until it has doubled in size. Set in a warm area if your kitchen is too cold. In winter, I heat the oven quickly (turn on 1 minute at 100°C) and turn off and leave the light on. Then I put the bowl in the oven.
- Or bulk rise in the fridge overnight.
- Once the dough has doubled, punch down and ease out onto a floured surface. Divide depending if you want big or small-ish rolls. If you want big rolls, divide into 2, then roll into logs (about 30 cm/12 inches long and 5 cm/2 inches wide). For smaller rolls, divide dough into 4, roll each piece of dough into logs, about 20 cm/8 inches long and 4 cm/1.5 inches wide).
- Then pat one piece of dough into a rectangle, eliminating as much air as possible.
- Then roll the dough tightly, pressing each row tightly into the dough. Once you get a log, roll and pat the log into shape.
- Prepare 2 baking sheets by lining them with baking paper or silicon baking mats. Pour your breadcrumbs into a shallow bowl.
- Cut each dough using a dough cutter or a flat knife, into 1 inch/2.5-centimeter-thick pieces. Roll each piece in the breadcrumbs and arrange on the baking sheets making sure there is space in between as these will still rise. Cover with a dry kitchen towel and let rest until it has puffed up a bit (but not doubled), 30 minutes to 1 hour (depending on how cold your kitchen is.)
- While the pandesal is proofing, preheat oven to 375°F/180°C.
- When the pandesal is ready (do the poke test as detailed above), bake in the oven for 20-25 minutes, alternating the trays halfway.
Notes
Read the blog post for tips on making pandesal.


