
Do you miss your favorite fluffy ensaymada, but believe you cannot bake these at home? Let me tell you, you can! Read on as I share tips and tricks for fluffy ensaymada at home, even without a stand mixer.
Ensaymada.
Why are you so delicious?
Obviously, one of my favorite bakery breads is ensaymada.
I will gladly eat an old-fashioned bakery ensaymada slathered with margarine and sugar, but I surely love the soft fluffy morsels it has evolved into.
I had a craving for cheese rolls one day, and a Google search sent me to Pepper.ph’s cheese rolls recipe, which they promise to be as soft and fluffy as a famous local café.
They had a secret ingredient.
Instant mashed potato flakes.
I have heard of potato bread.
But instant mashed potatoes in bread?
I had to try!
Instant mashed potato flakes are very easy to source in Germany and Switzerland. Mashed potatoes are commonly prepared here from a packet, though I haven’t made it myself, as I am a snob and mashed potatoes from real potatoes are simple and easy to prepare.
If you cannot find instant mashed potato flakes, you can substitute with the same weight of boiled, then mashed potatoes.
Ensaymada dough is enriched
Anyway, back to the ensaymada. Essentially, the dough for cheese rolls and ensaymada are the same. I had issues with the cheese oozing out of the cheese rolls, so I decided to make ensaymada instead when I crave this type of bread.
Ensaymadas are essentially made from brioche-type enriched dough. An enriched dough is bread dough that contains fats, dairy, and sugar. I’ve seen some recipes that use up to 12 egg yolks! But, I’ve had good results with fewer egg yolks. I’ve upped the egg yolks in Pepper’s recipe by one.
Enriched dough is very forgiving. They can be adapted to your schedule. The refrigerator is your friend!
But first, if you are new to bread baking, some notes.
I suggest going to my pandesal post as well to read some notes on making bread without a stand mixer.
On top of that, here are some additional notes.
FLOUR
Flour varies from country to country. The protein content of an all-purpose flour of one brand may be different from another brand. You have to test your flours.
In Switzerland, there is no such thing as all-purpose flour. We have Weissmehl (white flour), which is the common flour used in baking. It is a superfine flour, with low ash content. But, I found that the protein content is too low, that when I used all Weissmehl for bread, the resulting bread was too soft. What I do then, is mix in some Halbweissmehl (semi-white flour) to up the protein content.
In Germany, I found that the Type 550 flour is good for white bread, like ensaymada, pandesal, and Spanish bread.
In Luxembourg, there are bread flours readily available, based on what bread you want to make. You will want the white bread flour (farine pour pain blanc) for this.
Test your flours to find what will work for you.
POWDERED MILK
Powdered milk is not commonly sold in the groceries I frequent in Germany and Switzerland. I have a pack from the Philippines (which I also use to make polvoron).
That being said, I have made this with full-fat fresh milk with good results. Simply substitute the water and powdered milk with fresh milk.
CHEESE
I top my ensaymadas with cheddar cheese. Queso de bola will be awesome if you have some. I have tried Edam, but the taste is not as strong as the queso de bola available in the Philippines. Apparently, the queso de bola sold in the Philippines has a higher salt content to satisfy the Filipino palate.
Top yours with whatever cheese you love.
BUTTER
I always use unsalted butter in my baking, but I don’t think using salted butter would impact it so much. Decrease the salt by a couple of grams.
DO I NEED A MIXER?
No. You can mix everything with hand. I would suggest kneading it a bit though to develop the gluten. With the flours I use, I end up with quite wet dough, so I prefer to use the mixer. But, I have also made it by hand. (See video how I do it by hand.)
But to sufficiently build gluten, I love to do the bulk rise, or first rise, overnight in the refrigerator. This makes the dough easier to handle as well when it is cold.
If I am in a hurry, I finish the first rise in a warm place (takes 1 to 2 hours, depending on the temperature), and put in the refrigerator for at least 30 minutes for ease of handling.
OTHER TIPS
Weigh out the ingredients. While I also gave the measurement in their approximate cup measurements, I prefer to weigh out the ingredients when I am baking bread. This means I only need to use one or two bowls. It is also more accurate than measuring dry ingredients in cups. If you don’t have a weighing scale yet, buy one! They are inexpensive and so useful in the kitchen.
Use oil when rolling out the dough. I don’t like to use flour when I roll out the ensaymada dough and I found out that for dough this sticky, oil does wonders. Use a neutral-flavored oil, like canola or vegetable oil. Rub oil thinly in your hands and work surface and tip the dough on the oiled work surface. Oil hands as needed.
Or use silicone baking sheets for shaping the rolls. These are non-stick and make clean-up easier as well.
Let me walk you through making the ensaymadas BY HAND.
The only difference with using a stand mixer is the kneading part, so if you have a stand mixer, you may put all the ingredients in your mixer bowl and knead for around 10 minutes (although I still strongly suggest an autolyse, then knead for 5 minutes). Then the process will be the same.
AUTOLYSE

Into a large bowl, mix your flours. Add the room-temperature butter cubes and work it in with your fingers until the flour feels mealy and you have no big butter pieces left.
Then add in the sugar, milk powder, salt, and mashed potato mix.
Make a well in the middle. Then pour in the water, the egg yolks and the yeast. Mix well.
Cover and set aside for at least 30 minutes and up to an hour.
KNEADING BY HAND
Release the dough from the bowl by folding it into itself. You do this by putting your hand under the dough, pulling upwards a bit and folding the dough down in the middle. Do this a few times until the dough is unstuck from the bowl. If the dough is too sticky, you may work in a bit of flour.
I like to start my kneading in the bowl. I find it a bit difficult to explain how I do it, so here is a video.
I basically slap and fold the dough, then mix a bit, then slap and fold again. If the dough is a bit sticky, I sprinkle a little flour. I continue doing so for a couple of minutes until the dough has come together and looks smooth.
You can also knead on a floured surface. Whatever works for you, as long as you knead the dough a bit to build gluten.
After that, cover and let rise until double in size.
INITIAL RISE OF THE ENSAYMADA DOUGH
The initial rise takes anywhere from 1 to 2 hours, depending on how warm or cold your kitchen is.
What I like to do, as this dough can be quite sticky, is let the dough rise a bit then stick it in the fridge for a few hours, up to overnight. The cold dough makes for easier handling.
SHAPING ENSAYMADA

When the dough has doubled in size, divide the dough as follows:
For 18 medium-size pieces – 65 g each
For 24 small pieces – 45 g each
Or if you don’t have a weighing scale, divide as equally as possible.
Both sizes can be proofed in muffin tins. I like to use silicone muffin pans for these to avoid having to grease the tins. A bit less work. If you have only metal, you will need to grease them well.
Here is a slide-show for how to shape the ensaymada.


Or a video, if that is more your style.
Get a piece of dough.
Using the heel of your hand to flatten the dough and your fingers to regulate the shape, shape the dough into a rectangle.
Spread softened butter in the middle. Roll up tightly and pinch the edges.
Lengthen your dough rope a bit, then coil it from left to right to make an ensaymada. Pinch the ends to close.
Place in your prepared muffin tin. Repeat with remaining dough balls.

FINAL PROOF
Cover and let proof for 1 hour. They should be ready to be baked when they are puffy and have risen at least 50%.

When the dough is almost ready, pre-heat oven to 180°C/375°F. Bake for 18 minutes for the 65 g ensaymadas and 15 minutes for the 45 g ones.
Leave in the muffin tins for 5 – 10 minutes, or until cool enough to handle, and remove and finish cooling on a wire rack, because not doing so will cause the ensaymada to sweat and the rolls will become moist.
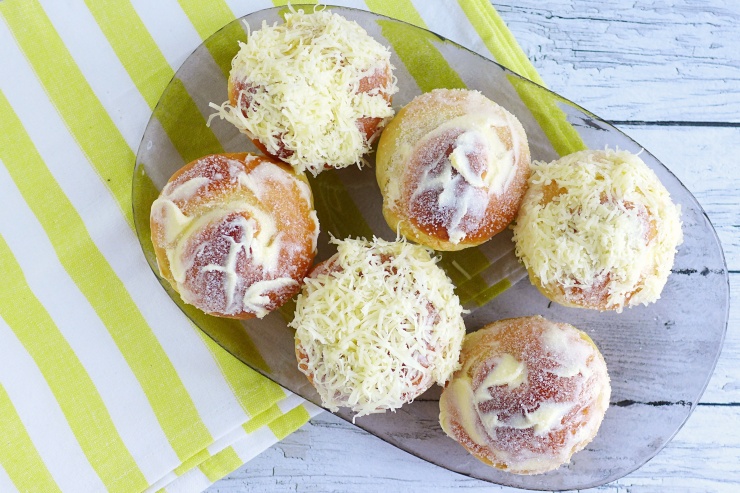
Top the ensaymada
Slather with softened butter, sprinkle with sugar and top with cheese, if you wish.

The baked ensayamadas can be stored in the freezer for a few months. Defrost for a few hours before eating.
Here is a video of the whole process of making ensaymada
PIN THE ENSAYMADA RECIPE FOR FUTURE REFERENCE

Calories
Fat
Carbs
Protein

Tweety
Yields 18 - 24 pcs
Super fluffy cheesy ensaymada made WITHOUT a stand mixer.
4 hr, 30 Prep Time
18 minCook Time
4 hr, 48 Total Time

 Save Recipe
Ingredients
- 300 g (around 2 ½ c) bread flour
- 200 g (around 1 ½ c) all-purpose flour
- 7 g (2 ¼ tsp) instant yeast
- 15 g (2 tbsp) milk powder
- 10 g (1 ½ tsp) fine sea salt
- 95 g (scant ½ c) white sugar
- 45 g (2/3 c) mashed potato mix or boiled then mashed potatoes
- 3 large egg yolks
- 335 g (1 1/3 c + 1 tbsp) warm water, add more if needed
- 112 g (1/2 c) butter, at room temperature, cubed
- Softened butter
- Softened butter
- White sugar
- Grated cheese (cheddar or Queso de Bola are good options)
Directions
- Into a large bowl, mix your flours. Add the room-temperature butter cubes and work it in with your fingers until the flour feels mealy and you have no big butter pieces left.
- Add in the sugar, milk powder, salt and mashed potato mix.
- Make a well in the middle. Pour in the water, the egg yolks and the yeast. Mix well.
- Cover and set aside for at least 30 minutes and up to an hour.
- Release the dough from the bowl by folding it into itself. You do this by putting you hand under the dough, pulling upwards a bit and folding the dough down in the middle. Do this a few times until the dough is unstuck from the bowl. If the dough is too sticky, you may work in a bit of flour.
- Knead the dough in the bowl for a minute, then, release the dough onto a floured surface and knead some more. 2 or 3 minutes should be enough.
- After that, cover and let rise until double in size.
- If you are using a stand mixer, I still strongly recommend an autolyse. Then knead on low (2 on a Kitchen Aid) for 5 minutes.
- Cover and let rise until double in size.
- The initial rise takes anywhere from 1 to 2 hours, depending on how warm or cold your kitchen is.
- What I like to do, as this dough can be quite sticky, is let the dough rise a bit then stick it in the fridge for a few hours, up to overnight. The cold dough makes for easier handling.
- When the dough has doubled in size, divide the dough as follows:
- For 18 medium-size pieces – 65 g each
- For 24 small pieces – 45 g each
- Or if you don't have a weighing scale, divide as equally as possible.
- Both sizes can be proofed in muffin tins. I like to use silicon muffin pans for these to avoid having to grease the tins. A bit less work. If you have only metal, you will need to grease them well.
- Get a piece of dough. Shape into a rectangle by using the heel of your hand to flatten the dough and your fingers to regulate the shape.
- Spread softened butter in the middle. Roll up tightly and pinch the edges. Lengthen your dough rope a bit, the shape into an ensaymada by coiling it from the left to the right. Pinch the ends to close.
- Place in your prepared muffin tin. Repeat with remaining dough balls.
- Cover and let proof for 1 hour.
- Pre-heat oven to 180°C/375°F. Bake for 18 minutes for the 65 g ensaymada and 15 minutes for the 45 g ones.
- Leave in the muffin tins for 5 – 10 minutes, or until cool enough to handle, and remove and finish cooling on a wire rack. Not doing so will cause the ensaymada to sweat and the rolls will become moist.
- Slather with softened butter, sprinkle with sugar and top with cheese.
- The baked ensayamada can be stored in the freezer for a few months. Defrost for a few hours before eating.
Notes
Prep time includes autolyse, rising and proofing time. Total active time is around 30 minutes.


