
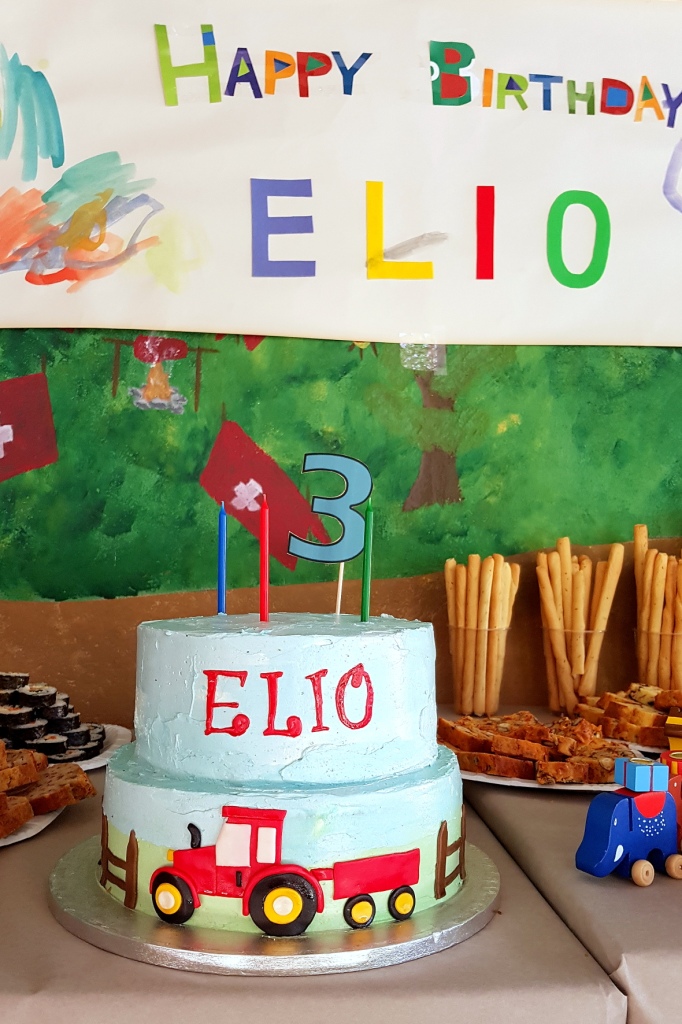
My friend’s son, Elio, is turning 3 years old and he had an advanced birthday celebration last weekend. He likes tractors and his mom asked me to make a tractor cake. I made a 2-tier (10-inch and 8-inch) buttercream cake with fondant tractor accents for him. It has been a while since I made fondant decors for a cake and I had forgotten how much fun it is, albeit quite detailed work.
I will be sharing now how I made the fondant decors for the bottom-tiered cake. You will see the step-by-step pictures of how I did it, so you can do it at home too!
First, you need fondant. You don’t need a lot, 100 grams of white fondant is more than enough. Because of the small amount I needed I decided to make my own marshmallow fondant. It is quite easy to make at home and tastes way better than store-bought fondant. It is also perfect to use for modeling and making fondant cut-outs (like we will be doing here.) I have posted a tutorial on how to make homemade marshmallow fondant, so if you want to make your own, click here. I also have some tips on working with fondant there.
Here is the drawing of the cake I made for planning the template.

Materials needed for the fondant tractor cake:

– Fondant – red, black, yellow, white and brown (I estimate around 25 grams each of red and black, 5 – 10 grams each of yellow and white and around 40 grams brown. I definitely had more and had a lot left over, but I gave it to Becca to play with, so it was ok)
– Rolling pin, if you have a small one use that
– Cutting mat, or if you have none, a clean chopping board will do
– Exacto knife or some other very sharp, thin knife
– Ruler (in centimeters)
– Square and Circle cutters or print and cut out the
– 12mm and 10mm pastry tip
– normal pastry tip (I have a set from Wilton), any will do as you need the big end
– Tappits for the letters for the name, or letter cookie cutters
– Cornstarch or icing sugar for dusting
– Paintbrush for attaching fondant pieces and cleaning the fondant pieces after
– Vodka for cleaning the fondant
Let’s get started. Let’s work on the tractor first.
Get a small bowl and put a pinch size of white fondant and dissolve with a teaspoon of water. This will be your glue.
Dust your cutting mat with cornstarch to avoid the fondant sticking. Roll out the red fondant thinly, around 2mm thick.
Cut out 1 red square 3×3 cm and a 4×4.5cm rectangle. Slightly taper the top of the square, attach to the bigger rectangle and taper as well the top. Cut a 0.5 x 4.5 cm rectangle for the roof of the tractor.

Roll out the white fondant thinly, around 2mm thick. Cut out 2 white rectangles, 2×2.5cm and 1x2cm. These will be the windows.

Additionally cut out 2 0.9cm white circles (I used the 10mm pastry tip) for the truck tires.
Attach the windows to the body of the tractor and taper the big window. Cut out space for the front and back wheels. Discard the red quarter circles. Roll out the black fondant, thicker than the red, around 3mm. Cut out the tires for the tractor. These are 4cm and 3cm in diameter. Additionally cut out the tires for the trailer, 2 cm in diameter each. I used the circle cookie cutters for these.

Roll out the yellow fondant thinly. Cut out the hubcaps:
1pc – 2cm diameter (smallest circle cookie cutter)
2pcs – 1cm diameter (12 mm pastry tip)
1 pc – 1.8 cm in diameter (big end of normal pastry tip)
Cut out a red 2x6cm for the trailer and a 0.5x2cm rectangle to attach the trailer to the tractor. Roll out a tiny piece of black fondant for the door handle and a slightly bigger one for the exhaust pipe. Cut out a 0.5×0.5cm yellow square for the headlights. See below.

For the tires, press down slightly into the center of the tires.
Assemble the tractor on your cutting mat. Roll out red fondant thinly to form the fenders.

For the fence:

Roll out the brown fondant thinly. Cut out 15 1×5 cm rectangles. Pinch the ends to make a spike.
Cut out 30 0.5x3cm rectangles.
I used a bench knife to cut them and it made the work quite quick.
(This is for a 10-inch cake. If you have a smaller cake, i.e. an 8-inch cake, you will need less fence.)

Assemble the cake:
Get the bottom-tier of your cake. Start by sticking the first tire, and work your way from there. As the icing is buttercream, the fondant should stick easily.

Finish sticking the other parts of the tractor. Use the end of your paintbrush to set the parts in place.

Make the fence and go around the cake.

Pour a bit of vodka (around 1 teaspoon) into a small bowl. Dip a clean paintbrush into the vodka and use that to clean up any excess cornstarch or icing sugar on the fondant.

Make the top tier. I cut out the letters for Elio using a Tappits cutter. You may use letter cookie cutters, or hand-cut the letters, as you wish.

Assemble the cake:
I assembled the tractor cake at the party’s venue as it was easier to transport separately. I also prepared the bottom tier for stacking by stabilizing it with skewers. This was done by cutting out 10 skewers in the height of the cake, and sticking them into the cake, 2 skewers together for added strength. Check this file Cake doweling to see where to stick the skewers in. It is important to ensure that the top cake will not sink into the bottom tier. If you have a light top cake, i.e. sponge or chiffon cake, you might not need to stabilize the bottom tier. I will still do it though, just to be sure. Don’t forget to tell the recipient of the cake that there are sticks inside the cake!

Be careful when stacking the finished tractor cake. Ask someone for help to check if it is centered. Also, bring extra icing as there might be a gap between the two cakes. I had to use extra icing to cover the gap.
I made a number 3 on the computer and printed it out on cardstock, cut it out and stuck it to a skewer.

Elio’s eyes lit up when he saw the tractor cake! That was more than enough to make the work worth it! After he blew out the candles, he and another friend of his sat down and started eating the fondant off the cake! They started with the fence and didn’t stop until they ate most of it.
Here are some of my cake recipes that you can use as base cakes:


