
Learn how to transfer drawing onto fondant with confidence!
Are you like me and have no confidence drawing free-hand on fondant?
Are you scared of making an indelible mistake?
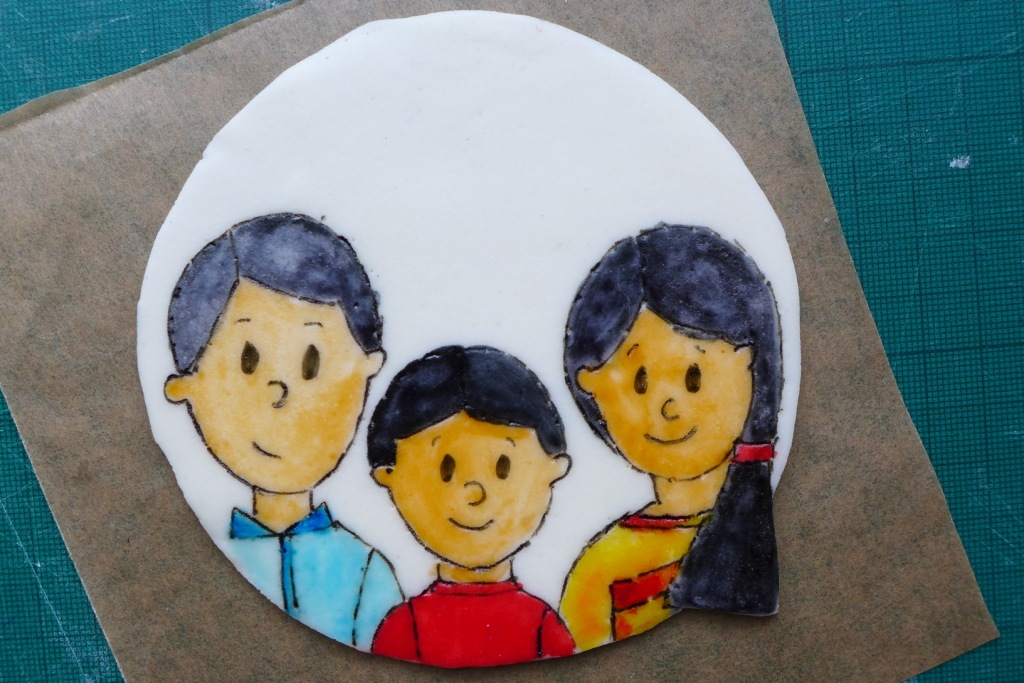
I had received a cake order on which my friend wanted fondant figures of her, her husband and son, to celebrate their 10th wedding anniversary.
Fondant figures!
I’m scared of those! I could already imagine my anxiety because I always over-think these things.
What if the fondant people look so ugly and they won’t ever order a cake from me again!
I didn’t want to promise that I could deliver fondant figures which would be up to my standards.
So, I instead suggested a 2D drawing on fondant.
And I was so relieved she was open to a 2D drawing and accepted my proposal. I sent her my proposal and she loved it!
So, if you’re in the same boat as me, I’m here to hold your hand!
Let me help you to be fearless and learn to transfer drawing onto fondant with certainty!
Let me share my process on how I transfer drawing from paper onto fondant and paint it with a watercolor effect.
Materials:
- Drawing or image to be transferred
- Scissors
- Fondant (you might want to try using homemade marshmallow fondant)
- Rolling pin
- Pin
- Exacto knife
- Food-safe pens
- Food coloring
- Plate
- Small bowl of water
- Clean paintbrush (reserved for fondant painting)
Steps on how to transfer drawing onto fondant:
First, draw or print out the image you want to transfer to fondant.
For this example, I needed a round image for a family portrait. I drew a circle, using my 4-inch cake pan as a guide, and drew my portrait inside.
Then, cut out your image.
Roll out your fondant around 3mm thick. I like it slightly thicker because I will be painting on it.
Then place your cut-out image on the fondant and cut out the outline with an exacto knife.

Next, using a clean pin, prick through your drawing, spacing the pricks as far as you’re comfortable with. This will be your outline. Think of it as creating a “connect-the-dots” puzzle for yourself.

Once you have finished pricking, remove the paper.

Then carefully connect the dots with a food-safe pen. This will be your outline.

Use a plate as your palette and place tiny bits of food coloring on it.
Start painting your image, making finishing touches with a food-safe pen if needed.

Set your masterpiece aside onto a safe place (away from curious hands!!) and let dry for at least overnight.

With steady hands, place your artwork on your cake and finish decorating.

That’s it! Now, you can go crazy with any drawing or image you want to transfer onto fondant. It’s not as hard as you think!
Other how-to’s you might like:
How to make homemade marshmallow fondant


